Part 1: Creating a New Campaign List
On the main Campaign page, click the ellipses next to your campaign and select Add New List for the intended respondents.

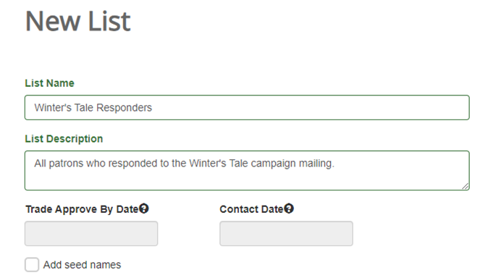
You will then be prompted to enter four pieces of information for the list:
- List Name: The name displayed under the campaign in the recent Lists section, e.g., “Winter’s Tale Responders.”
- List Description: Detailed information about the list, e.g., “All patrons who responded to the winter’s tale campaign list.”
- Trade Approve by Date: The deadline for approving trade requests; leave blank if not applicable.
- Contact Date: The date the mailing will be sent or when you plan to contact patrons.
After creating the list, return to the Campaign page, select your new list, and choose New Custom Segment from the “Include in list” dropdown.
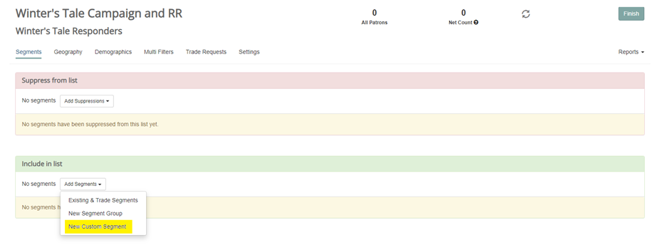
This will prompt you to enter a description for the segment and select it for the Response Report. Follow these three steps to create the segment:
1. Enter a description that will serve as the segment name, e.g., Winter’s Tale Buyers.
2. Select your organization’s name.
3. Add criteria that match all conditions, such as setting the year to “2024” and the event to “The Winter’s Tale.”
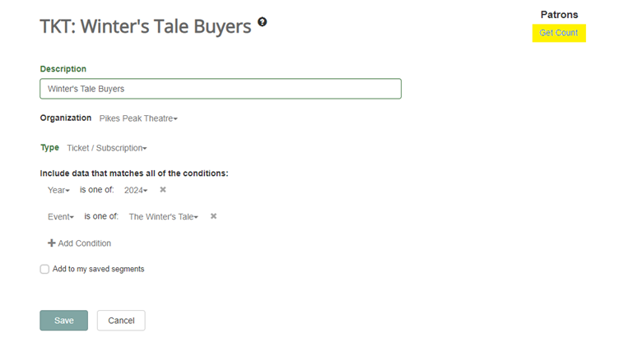
*Note: You do not need to click “Add to my saved segments” at this stage.
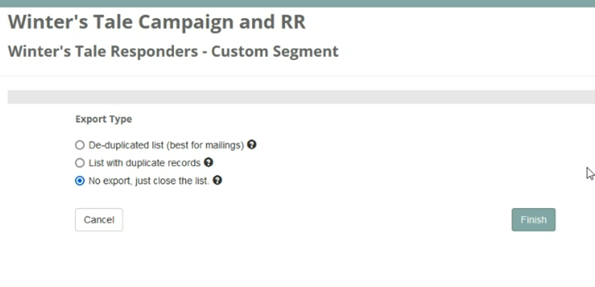
After saving the segment, return to the Campaign page, click the “Finish” icon, select “No export, just close the list,” and confirm by clicking “Finish.”
 Make sure the mail and responders list are closed by selecting, "No export, just close the list," before proceeding to export the report.
Part II: Creating a New Response Report
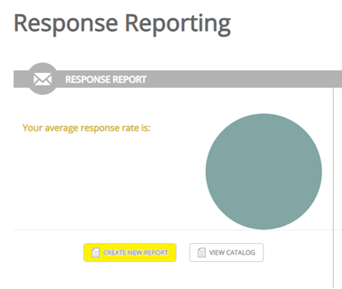
Go to the Response page, and under RESPONSE REPORT, click the CREATE NEW REPORT button.
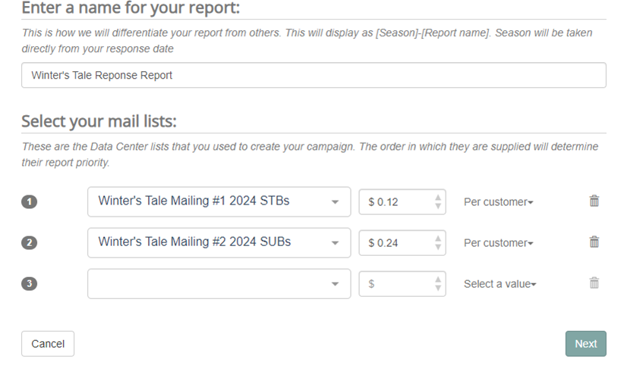
Then, enter the basic information, including the report name and corresponding mail lists. For example, the report could be named “Winter’s Tale Response Report” with two selected mail lists. It is advisable to provide the per customer mailing cost or total expense for ROI calculation; for instance, $0.12 for the single ticket mailing and $0.24 for the subscription mailing.
Click Next to continue.
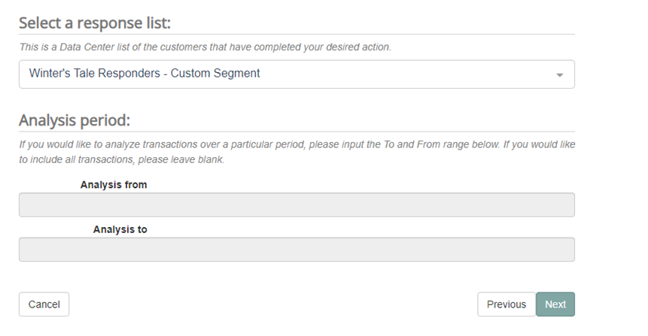
Select the list from Part One and specify the Analysis period. Set the date range to match the relevant mailing or offer.
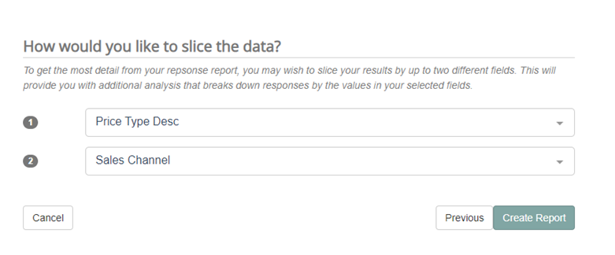
[OPTIONAL] You may add up to two of the 19 available fields for additional analysis, such as Price Type Description and Sales Channel. These will be included in the Excel file of the Response Report.
Click Create Report to complete the setup.
Part III: Accessing Your Report
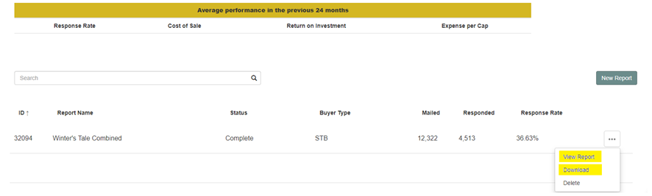
After your report completes, you'll receive an email with a link to your Report Catalog. Click the ellipses icon to view the PDF (View Report) or download the Excel file.
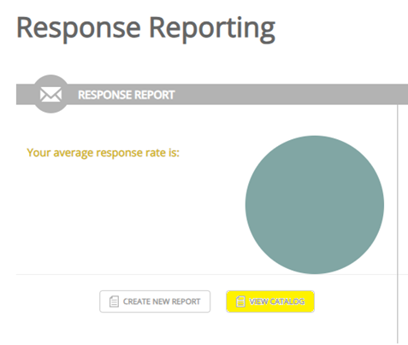
Users may also access the Report Catalog via the Response home page by selecting “View Catalog.”
*Note: In this document, “response” indicates patrons who received the campaign mailing and consequently bought a ticket.