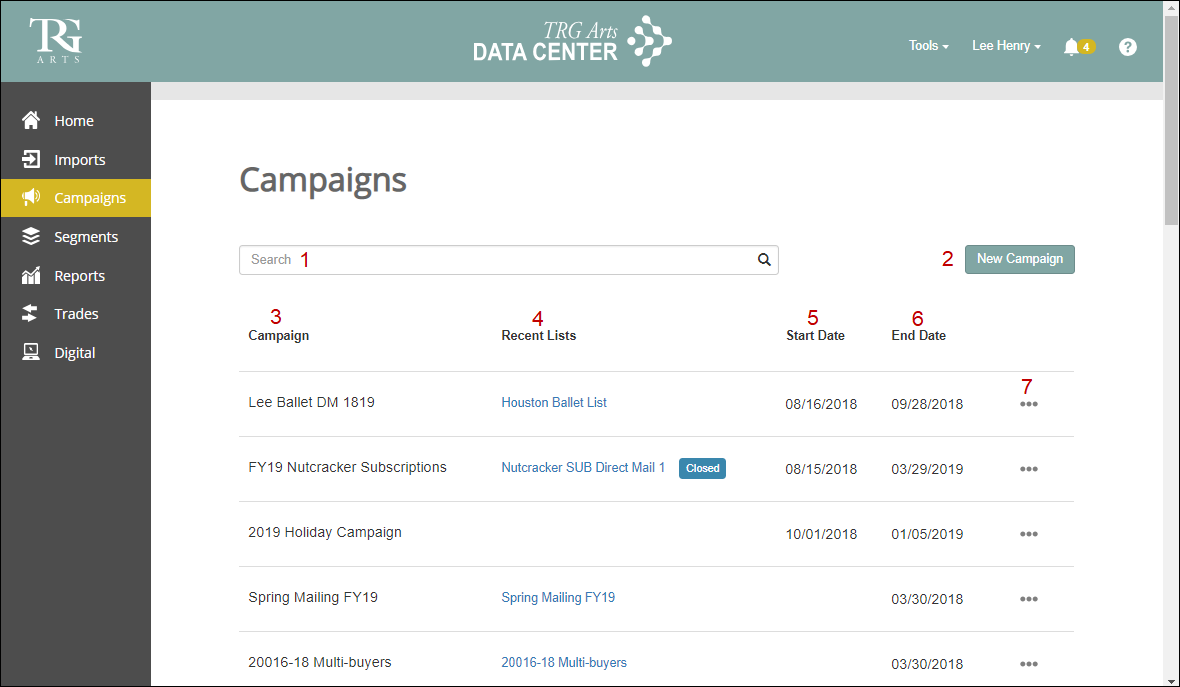
Campaigns is where you can see all of your lists associated with a campaign. It is also where you can build direct mail, email, or phone lists using your own data, OR where you can build direct mail lists that contain trade data. Campaigns shows every list you've ever created in Data Center.
- Search - Enter any text for a campaign or list to find all matches.
- New Campaign button opens a dialogue to create a new campaign and the initial list for that campaign.
- Campaign shows the Campaign name that you assigned.
- Recent Lists shows all lists associated with the campaign.
- Start Date shows the date that your campaign begins.
- End Date shows the date that you expect your campaign to complete.
- View Details button opens the Campaign detail and option to Add a New List to an existing campaign.
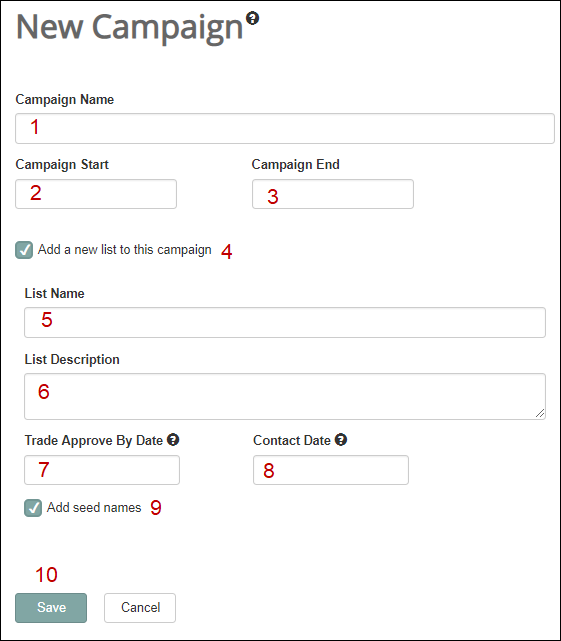
Create a New Campaign & List
The Campaigns page allows you to associate multiple lists to a singular campaign to better track patron response.
- The Campaign Name field should align with your campaign or research purpose. For Example “2018 Subscriber Acquisition.”
- The Campaign Start Date field is the beginning date of your campaign.
- The Campaign End Date field is the date that your officially ends.
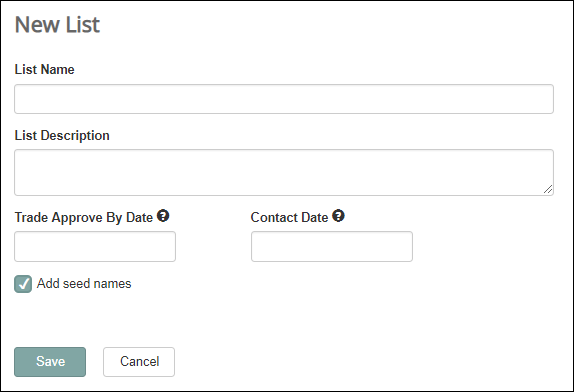
- Keep the Add a new list to this campaign box checked to create a list at the same time as your new campaign.
- Enter a List Name specific to that mailing, email, or phone list.
- List Description is useful for future reference should you want more detail about the list and campaign.
- Trade Approval by Date is the date by which all trade responses are needed.
- Contact Date is the date your mailing leaves your mail house.
- Check the box for Add seed names to include your account seed names in lists.
- Click the Save button to create your campaign and list.
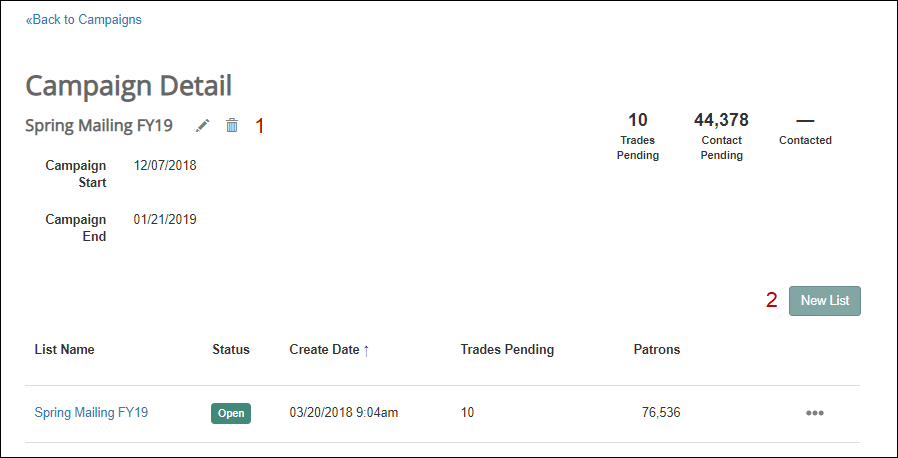
Add a List
You can add a list to an existing campaign.
- Go into the campaign in which you want to add the new list.
- Click on the
 button at right of the campaign.
OR
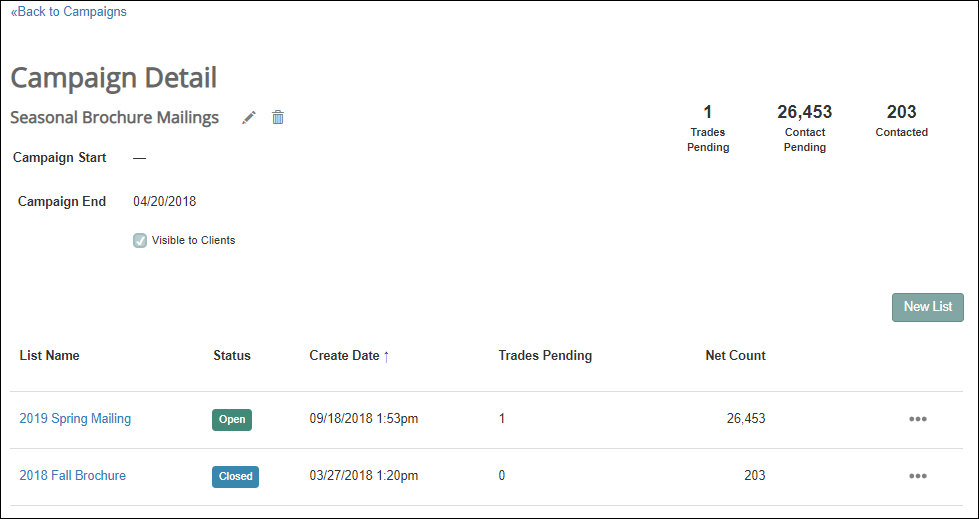
From the Campaigns page, Click on the![]() more button and select Add New List from the dropdown.
more button and select Add New List from the dropdown.
- Enter a List Name specific to that mailing, email, or phone list.
- List Description is helpful to understand the purpose of the list within the campaign for any future reference.
- Trade Approval by Date is the date by which trade responses are needed.
- Contact Date is the desired date your mailing leaves your mail house.
- Check the box for Add seed names to include your account seed names.
- Click the Save button to create your campaign and list.
The List Builder
Your new list opens if you selected to create a new list within an existing campaign. Auto-add segments will populate to either the Suppression or Include sections of your list if you have set segments to auto-add. Go to Segments to modify auto-add settings for future lists.
Now you can add your segments, trade segments, segment groups, or custom segments to your list as well apply any filtering by list or individual segment.
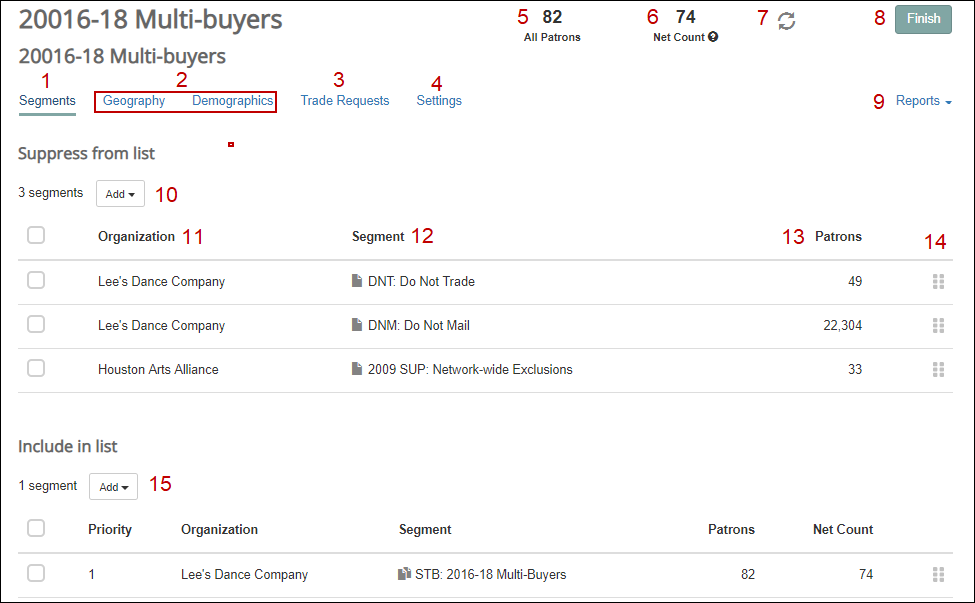
- Segments is where you’ll click to add your segments, trade segments, or create a segment group or custom segment.
- Geography and Demographic Filters all appear next and allow you to filter your list to target specific patrons.
- Trade Requests shows you the status of your trade requests.
- Settings shows you the details about your list settings such as name, description, and contact date.
- All Patrons shows the total number of patrons in the include portion of your list.
- Net Count shows the de-duplicated, post filter count of all households in your list.
- Refresh simply refreshes your view if you make changes.
- Finish button is what you’ll click to send your list to your mailhouse.
- Reports shows your list reports such as List Overview, List Segment Crossover, etc.
- Suppress from list shows all segments assigned as suppression for your list and provides a dropdown menu to Add more segments for suppression.
- Organization shows the organization to which the segment belongs.
- Segment shows the segment name.
- Patrons shows the patron count for the associated segment.
- Drag and drop handle - the six dots at right are a handle that allows you to drag and drop your segment to a new priority or move the segment between suppress and include sections of your list.
- Include in list shows all segments for those patrons that you want to mail to and provides a dropdown menu to select all segmentation for Include.
Add Segments to your List
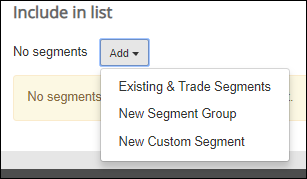
Include Segments dropdown allows you to add segments from your account, trade organizations, group segments together, or create a custom segment.
- Existing & Trade Segments: This is where you can see and select segments from your account OR segments from other organizations in your network.
- New Custom Segment: This option appears if your account is set up for transactional list building capability.
- New Segment Group: Allows you to combine multiple segments that function as a single segment.
Existing Segments
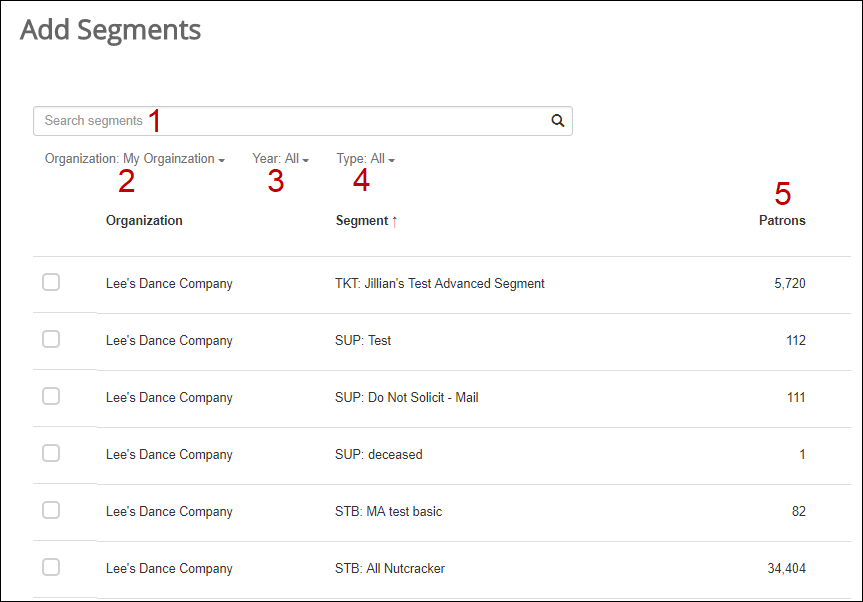
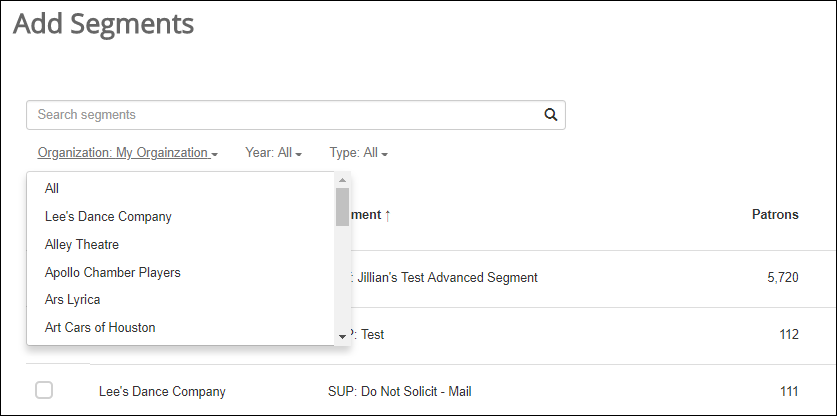
Select Existing Segments & Trade Segments to choose your own Segments or Trade Segments from organizations within your community network. The default view is your own data.
- Search for segments by description.
- Filter for and select another Organization in your community network.
- Filter for and select by Segment Year.
- Filter for and select by Segment Type.
- Patrons shows the number of patrons in the segment.
Select Organization
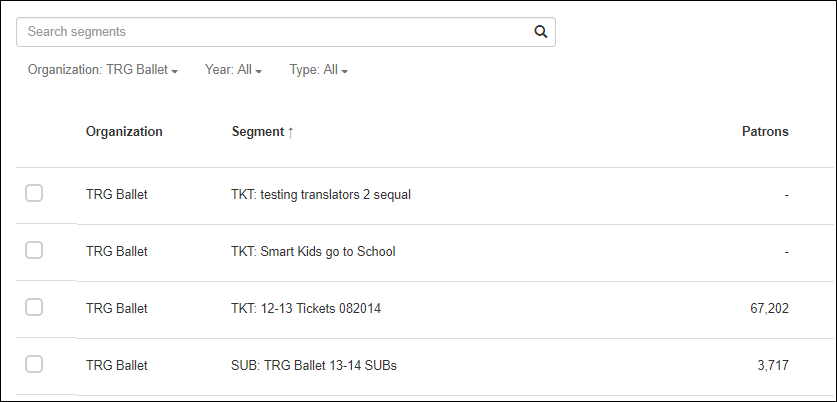
Click on the Organization filter and select a trade organization within your community network.
Now you can further filter by segment year or type within the trade organization for their visible segments.
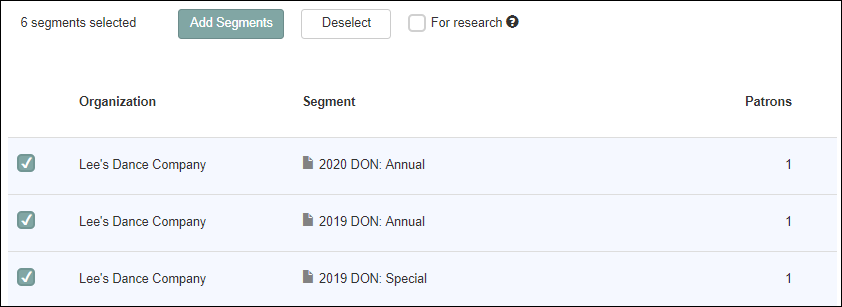
Click to the left of each segment you want to include and then click the![]() Add Segments button at top to add them into your list.
Add Segments button at top to add them into your list.
You’re returned to your list and the selected segments now appear.
Custom Segment
Only accounts set up with transactional data import will have access to the Custom Segment option. Custom Segment allows you to build a segment based on imported fields from your transaction files. You can create a Custom Segment from your data or from trade organizations who also use transactional data import. The number of fields available depends on the completeness of data imports within your account or from your trade partner.
- Click the Add dropdown then click on New Custom Segment.
- Write a segment Description—be consistent with your segmentation strategy if you’re planning on saving the segment for use in your account.
- Organization defaults to My Organization but allows you to select any organization in your community network. Note: only one organization can be selected at one time.
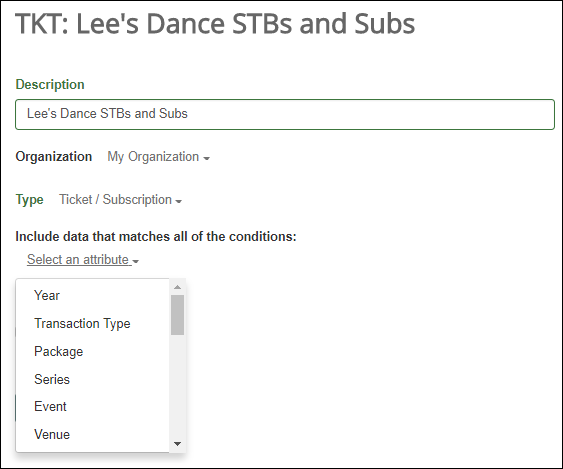
- Type describes the data type that you want to include and shows three selections:
- Ticket/Subscription
- Donation
- Membership
- Select an Attribute becomes active when you select a Type. Click on Select an Attribute and you’ll see the first filter condition for your custom segment. The dropdown lists all available fields based on your transactional data import.
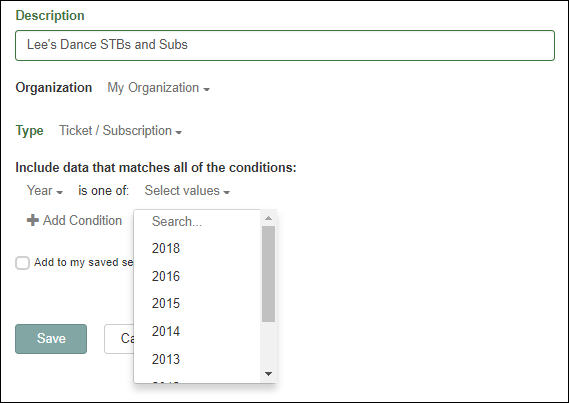
- In the image below, the condition selected was Year. When you select a condition, you activate the Select Values dropdown to choose the year or years to be filtered.
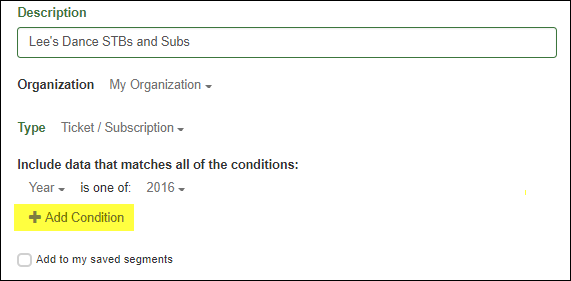
- You can add as many conditions as are available by clicking on the + Add Condition button.
Note: Selecting too many conditions can lead to over-filtering which will lead to low or zero household count.
- Click Add to my saved segments box to save the segment in your account.
- Checking that box activates Auto-Add and Trade Visibility settings.
- Click Save to create the segment and it is automatically added to your list and campaign.
Create Segment Group
A Segment Group is a customized segment that allows you to combine multiple segments into a single segment, and you can filter the results of these combined segments. You might use a Segment Group to combine like data from your account for a specific year. For example, you may want to combine multiple Single Ticket events for 2018 into a single segment. You might also want to combine multiple trade segments from a single organization into a single segment. Here’s how to create a Segment Group.
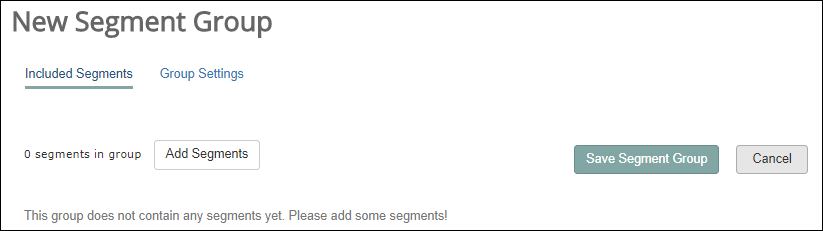
- Click the Add dropdown and select New Segment Group.
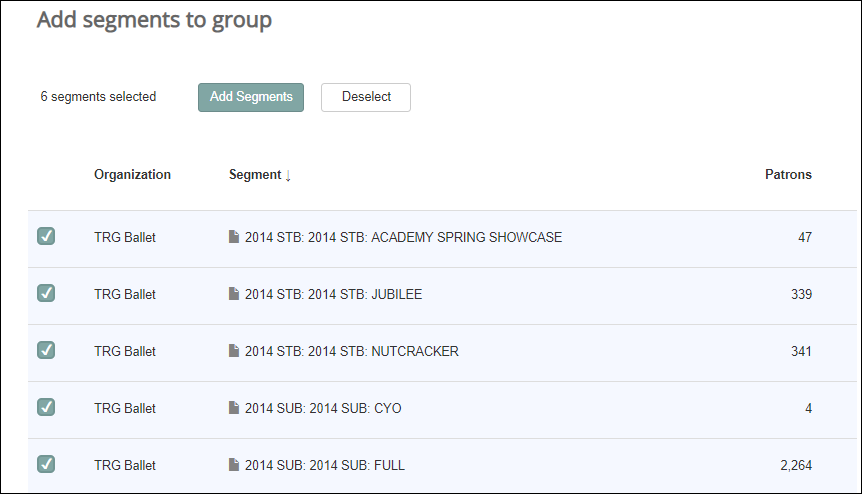
- Click the Add Segments button to search for segments.
- Select an individual organization or choose All from the dropdown and then filter by year or type if you want to include many organizations’ trade data.
- Click in the checkbox at the left of the segments you want to include.
- Click Add Segments button to add the segments as a group.
- Now you’ll click the
 Save Segment Group button.

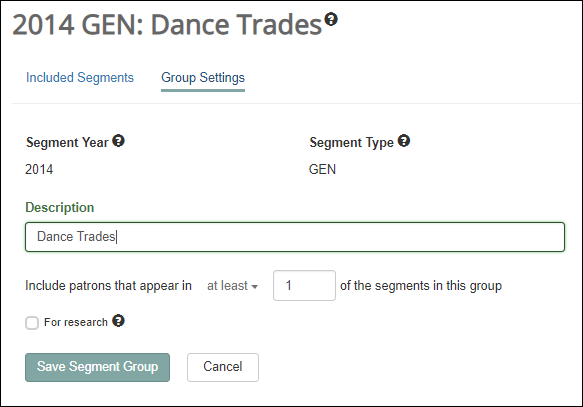
- Write a segment description for the new segment group.
- Click theSave Segment Group button again.
Note: Data Center does not permit duplicate segment names. The Segment Year does not populate in this example because multiple years are included in the group. The Segment Type defaults to GEN because multiple types are selected for the group.
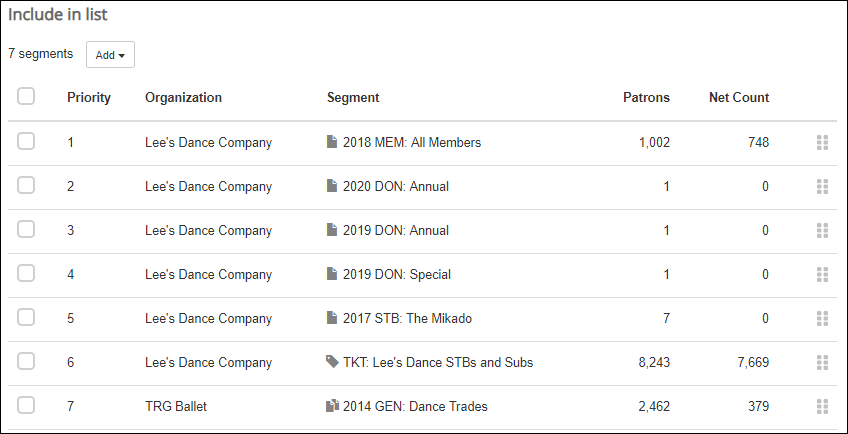
- The new segment group now appears in your Included Segments. The segment at the bottom of the image below is a segment group.
Note: the duplicate paper icon at right indicates a Segment Group.
Counts and Icons Defined
List Builder updates the Patrons and Households counts in your list as you make changes.
Net Count: Records generated are post-filters, de-duplicated, mailable households.
Patrons: Records generated are post-filters, all patrons in all included segments, mailable and non-mailable households.
The![]() single page icon indicates a Single Segment.
single page icon indicates a Single Segment.
The![]() double page icon indicates a Segment Group.
double page icon indicates a Segment Group.
The![]() Ticket icon indicates a Custom Segment.
Ticket icon indicates a Custom Segment.